Friday, December 31, 2010

Top Ten of 2010

2010 was my first "full" year of blogging, so I thought it would be fun to take a look back at the 155 recipes I posted this year and come up with a Top Ten. I selected these recipes by looking at which posts had the most comments as well as determining which dishes were favorites of my hubby and I. So here are the Top Ten of 2010 in no particular order. 


Parmesan Garlic Soft Pretzels with Honey Mustard Dip
pretzel


Perfect Pot Roast
pot roast


Cobb Guacamole
cobb guac


Monkey Bread
mokey bread


Creamy Cucumber Salad
Creamy Cuke


Breakfast Pizza
breakfast pizza


Homemade Ranch Dressing
ranch dressing


Gram's Pickled Beets
pickled beets


Shepherd's Pie
shephards


Buttered Rosemary Rolls
Rose rolls


Happy New Year and Happy Cooking in 2011!

Thursday, December 30, 2010

Swiss Almond Dip

DSC_4420
This creamy, cheesy, nutty dip is a Holiday favorite with my family. We usually eat it on Christmas Eve after church. My Mom gets credit for this recipe in our family cookbook, but I recently learned it is originally from her dear friend Barb.  This dip is perfect for your New Years' Eve parties because you can make it ahead and then just pop it in the oven when you are ready to eat. It saves well too, so if there happens to be any leftovers you can reheat it the next day.


Swiss Almond Dip
Printable Version
DSC_4393
Ingredients
8 oz Neufchatel cream cheese (the 1/3 less fat version)
1 1/2 cups shredded Swiss cheese
1/3 cup Miracle Whip (NOT mayo)
1/3 cup sliced almonds + 2 tablespoons
1/3 cup chopped white onion


Directions
Combine all ingredients (except for the 2 tablespoons of almonds). Mix well using a hand mixer.
DSC_4397
Spread mixture into a 9 inch pie plate. 
Bake for 6 minutes at 350 degrees. Stir after the six minutes and top with the remaining almonds. Bake again for 6 minutes. 
DSC_4401
Serve hot with vegetables, crackers, or pita chips.
DSC_4417

Wednesday, December 29, 2010

Peppermint Pattie Brownies

DSC_4465
A confession: I did not have any part in making these. My Momma made these and I got to eat them. That's the beautiful thing about coming home for the Holidays. I can blog the yummy things my Mom makes and share them with you without having to put in any of the work except for snapping some photos and blogging. That is why there are only pictures of the end product. No ingredient photos, no step by step photos, just the lovely fudge covered brownie and peppermint ice cream photos that I took right before eating a huge bite!


Except for the peppermint patties, everything is made from scratch. I guess that must have been a lot of work for my Mom. :) I think while she was making them I was taking a nap. If you are mint and chocolate person, you really need to make these. They are thick, rich and perfect for this time of the year when you can actually buy peppermint ice cream in the stores. 
DSC_4466
Peppermint Pattie Brownies
From the York Peppermint Patties Bag
Printable Version


Ingredients
24 small (1 1/2 inch) York Peppermint Patties
1 1/2 cups butter or margarine, melted
3 cups sugar
1 tablespoon vanilla extract
5 eggs
2 cups all purpose flour
1 cup cocoa
1 teaspoon baking powder
1 teaspoon salt


Directions
Preheat oven to 350 degrees (325 for glass baking dish). Remove wrappers from peppermint patties. Grease a 9X13X2 inch baking pan. Stir together butter, sugar, and vanilla in a large bowl. Add eggs and beat until well blended. Stir in flour, cocoa, baking powder, and salt and blend well. Reserve 2 cups of batter. Spread remaining batter in prepared pan. Arrange peppermint patties about 1/2 apart in a single layer over batter. Spread reserved 2 cups batter over patties. Bake for 50 to 55 minutes or until brownies begin to pull away from the sides of the pan. Cool completely in pan on wire rack. Cut into squares to serve. Serve with mint chocolate chip or peppermint ice cream.
DSC_4465

Tuesday, December 28, 2010

Seven Layer Salad

DSC_4461
This beautiful layered salad makes a regular appearance at our family celebrations. In fact, since I've been home for Christmas we've had it twice. It's super easy and you make it ahead of time, so on the the day you are serving it all you do is get it out. You can substitute your favorite veggies in this recipe - for example, we were out of green pepper so went with yellow and red. I think that tomatoes and mushrooms would also be yummy. Some people also mix in parmesan cheese with the mayo and then omit the shredded cheese on top. If you are feeding a larger crowd you'll want to double or triple the recipe.
DSC_4431
Seven Layer Salad 
From Aunt Marlene
Printable Version


Ingredients
3/4 head lettuce (we used two stalks of romaine, torn into pieces)
1/2 cup chopped pepper
1/3 cup chopped onion (can use white or green onions)
1 cup chopped celery
1/2 package frozen peas
3 hard boiled eggs, thinly sliced
1 cup mayo
Bacon bits or crumbles
Shredded cheddar cheese
DSC_4432


Directions
Place ingredients in 9X13 pan or salad bowl in the order given.
DSC_4445
Spread the 1 cup of mayo over the top of the eggs with a spatula to form an even layer and seal the top completely. Sprinkle the top generously with shredded cheese and bacon. 
DSC_4452
Refrigerate overnight or for 24 hours. 
DSC_4463

Sunday, December 26, 2010

Peanut Butter Fudge and Chocolate Fantasy Fudge

5294693108_9f83551db9
It has been a family tradition for several years now for my Mom, my Aunt Chris, my cousin Lindsey, my Gram Walters and I to get together right before Christmas to make candy. It's a special night I always look forward to because the five of us always have a lot of fun and laughs together. This year we decided to carry on the tradition in honor and memory of Grandma, who passed away in September. We knew Gram would want us to keep cooking together. So the night I flew home to Michigan the four of us made peanut butter fudge and chocolate fudge. The peanut butter recipe is from my Aunt Chris and is in our family cookbook, but the chocolate recipe is from the back of the marshmallow fluff container. No family secrets in that one! 


My favorite is peanut butter so let's start with that one first. We took a big plate of these to our family Christmas and it was all gobbled up.
DSC_4320
Peanut Butter Fudge
From Ashley's Cooking Adventures
Printable Version


Ingredients
2 cups sugar
1/2 cup milk
2 tablespoons butter
2 tablespoons peanut butter
1/2 cup light corn syrup
1/4 teaspoon salt
1 teaspoon vanilla


Directions
Combine sugar, corn syrup, milk, and salt and cook over low heat until sugar dissolves. 
DSC_4329
Cover for one minute. Boil until temperature reaches 236 degrees on candy thermometer or soft ball stage. Remove from heat and add butter, vanilla, and peanut butter until dissolved.
DSC_4336
Pour into greased pan (we used a pie pan but a 9X9 pan would work as well). 
DSC_4335


Chocolate Fantasy Fudge
From Jet Puffed Marshmallow Creme Bottle :)
Printable Version
DSC_4323
Ingredients
3 cups sugar
3/4 cup (1 1/2 sticks butter or margarine)
1 small can (5 oz) evaporated milk (about 2/3 cup) *Do not use sweetened condensed milk
12 ounces semi-sweet chocolate (we used chocolate chips)
1 jar (7 oz) Jet Puffed Marshmallow Creme
1 cup chopped walnuts (if desired)
1 teaspoon vanilla


Directions
Grease a 9X9 pan and set aside. Place sugar, butter, and evaporated milk in a large heavy saucepan. 
DSC_4339
Bring to a full roiling boil on medium heat, stirring constantly to avoid scorching. Boil for 4 minutes or until candy thermometer reaches 234 degrees (soft ball stage), stirring constantly. Remove from heat.
DSC_4345
Add chocolate and marshmallow creme; stir until completely melted.
DSC_4349 
Add walnuts, if desired, and vanilla. Mix well.
DSC_4350
Pour immediately into prepared pan and spread to form an even layer. Let stand at room temperature for 4 hours or until completely cooled. 
DSC_4352
Cut into 1 inch squares. Store in air tight container.
5294096777_c9d5ae33ce

Thursday, December 23, 2010

Cinnamon Applesauce Ornaments

DSC_4199
Even though this is not a recipe you can eat, it's just too cute not to share it with you. Especially because I have been slacking on posting Christmas-y things.


Every year when Christmas time rolls around I worry and worry about what to have my students make for their parents to give as a gift. For busy teachers, this alone can cause a lot of stress, not to mention time! In the past I've had my children make ornaments or picture frames that I buy and the kids assemble with glue. I've worried that they won't withstand the test of time because cheap crafts = cheap presents. So this year I decided to go the completely homemade route. I found these cinnamon applesauce ornaments on a super crafty blog called Add a Pinch. I loved how the ornaments only require three ingredients: cinnamon, applesauce, and white school glue. For a teacher, inexpensive is the key! So I doubled the "large" batch ingredients and had more than enough for my 16 first graders to make their ornaments. I got the idea from Robyn's salt dough ornaments to trace my students' little hands instead of using cookie cutters. I crossed my fingers, made the dough, and prayed that it all worked out. Not only did the hand ornaments turn out, they were so cute! We used toothpicks to cut them out and write the students' names and the year on the ornament. Since I don't really have access to an oven at school, I placed them on wire racks in the windows and turned them every other day. In just 3 days they were dried and ready for ribbon and wrapping. Another bonus to making these ornaments: my classroom smelled like cinnamon for days upon days. I hope some of you will give these a try. If you end up making these, please share with me your results!
DSC_4196
Cinnamon Applesauce Ornaments -- Large batch
From Add A Pinch
Printable Version

Ingredients
2 cups ground cinnamon
1 1/2 cups applesauce
1/2 cup white glue

Directions
In a large bowl or container combine all ingredients by lightly dusting your hands with cinnamon. Combine until smooth. Roll out to 1/4 inch thickness. *I found it was much easier to pat the dough out with hands instead of a rolling pin.* Cut out shapes with your favorite cookie cutters. Punch a hole in each ornament for ribbon and if desired write names and the year in the ornaments with a toothpick.
DSC_4200
Place ornaments on parchment paper lined baking sheets. Bake at 1 hour at 150 degrees or air dry on wire racks, for 3-4 days, turning every day. Once dry, string ribbon through the hole.
DSC_4203

Thursday, December 16, 2010

Corn Bread Taco Bake

DSC_4121
I have been having major cravings for Mexican food lately and had book marked Siggy Spice's Taco Corn Bread Bake over a month ago. I was drawn to it because of the bottom layer of corn bread. Before this recipe I had never made homemade corn bread, and living in the south, that is just inexcusable. 


Oh man, this is sooooooo good! Anything with layers of flavors and bubbly cheese on the top is going to be yummy and this recipe was no exception. Cornbread topped with season turkey topped with cheese, sour cream, green chilis topped with melted cheese. It's very filling and comforting.  Great for warming you up on a cold winter day. It also makes a ton of food! We had this for dinner two nights and for lunch one day too!
DSC_4098

Corn Bread Taco Bake
Modified From Siggy Spice
Printable Version


Ingredients
1 pan of cornbread  in a 9X13 pan - I made my own and put it in a 8X8 pan, do not recommend doing that because the cornbread was almost too thick
1 pound ground turkey
Taco seasoning (you can use a packet but I make my own)
1 can black beans (didn't use these)
1 cup sour cream
1 cup shredded cheddar cheese
1 onion, chopped
1 small can green chilies
1 medium tomato, chopped
1 can sliced olives
1/2 cup shredded lettuce 
Extra shredded cheese
1 avocado, mashed
Taco sauce


Directions
Preheat oven to 350 degrees. Mix cornbread according to directions and spread in a 9X13 pan. Bake according to directions.
DSC_4104
Brown turkey until no longer pink. Add in taco seasoning and black beans (rinsed and drained, if desired). Cook until most of the liquid evaporates, about 2 minutes.
DSC_4100
Spread meat over cornbread. Combine sour cream, cheese, onion, olives, and green chilies.
DSC_4106
Spread over meat mixture. 
DSC_4112
Cover entire pan with shredded cheese. Bake for 20 - 25 minutes or until heated through and cheese has melted.
DSC_4114
Top with tomato, avocado, shredded lettuce, and taco sauce before serving. 
DSC_4120

Tuesday, December 14, 2010

30 Things to Make Before I Turn 30: Oatmeal Raisin Cookies

DSC_4071
Today I am exactly 3 months away from the big 3-0, so I wanted to take a look at how I am doing on my 30 Things to Make Before I Turn 30 List. 


Here it is:

30 Things to Make Before I Turn 30

1. Cornish Hens [Check!]
2. Homemade Salsa [Check!]
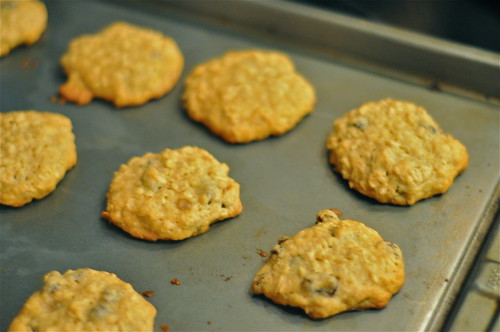
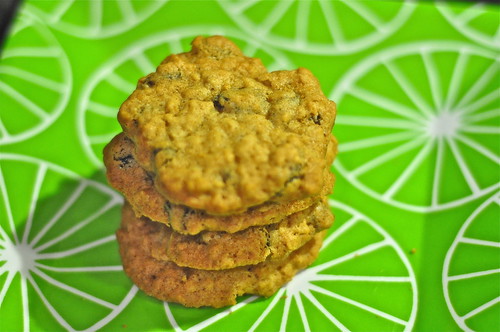
3. Oatmeal Raisin Cookies [Check!]
4.  Noodles from scratch  [Check!]
5. Cheese Souffle 
6. Blueberry Pie
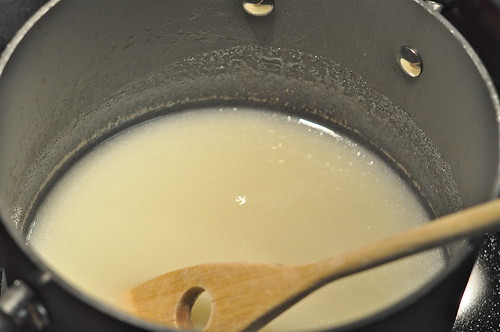
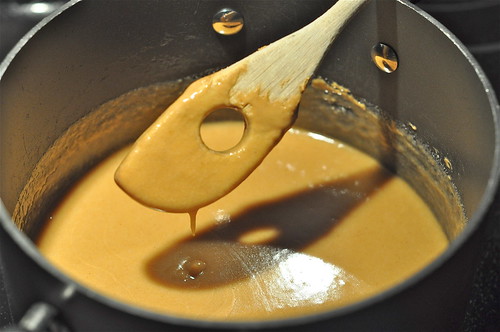
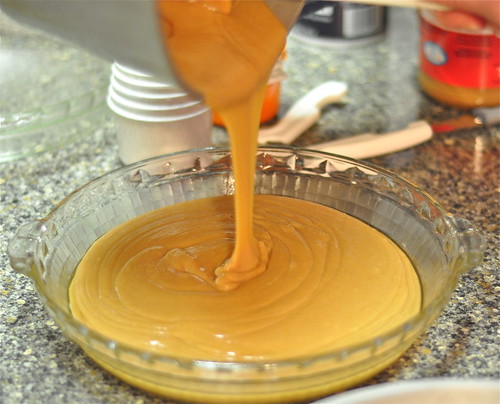
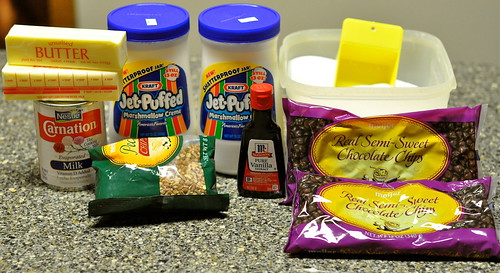
7. Homemade Marshmallows
8. She Crab Soup [Check!]
9. Beef Pot Roast [Check!]
11. Monkey Bread [Check!]
12. Yeast Bread
13. Sweet Potato Soup [Check!]
16. Scones [Check!]

17. Beer battered fish [Check!]
18. Homemade Granola [Check!]
19. Rack of lamb [Check!]
20. Pasties (Recipe from A. Chris)  [Check!]
21. Pioneer Woman's Rosemary Rolls [Check!]
22. Lasanga [Check!]
23. Eggplant Parmesean [Check!]
24. Fettucine Alfredo [Check!]
25. English Muffins
26. German Potato Salad[Check!]
27. Giada De Laurentiis's Basil Pesto Sauce [Check!]
28. Rib Eye Steak with Pan Jus [Check!]
29. Chicken Braised in Red Wine
30. Bean Burgers  [Check!]

So I have 6 more items that I need to check off in the next 3 months:
1. Cheese Souffle
2. Blueberry Pie 
3. Homemade Marshmallows
4. Yeast Bread
5. English Muffins
6. Chicken Braised in Red Wine

If you have any recipes or recommendations for the six remaining items, be sure to let me know!

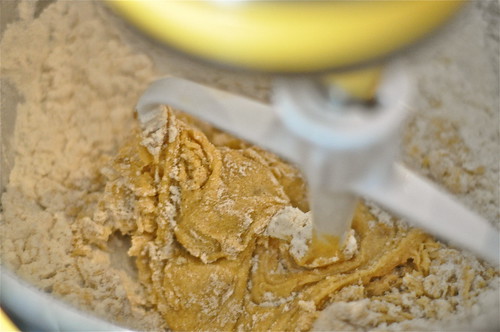
These Oatmeal Raisin Cookies were the very first thing I made using my beautiful new KitchenAid mixer that was an early Christmas gift from my fabulous husband. I was amazed at how much EASIER and QUICKER whipping up a batch of cookies is with the KitchenAid. I'm officially in love. 

Since I am not a huge chocolate fan, my favorite cookies do not contain chocolate - snickerdoodles, sugar cookies, and oatmeal raisins are definitely my top three. I had never made my own oatmeal raisin cookies before this. These cookies were turned out beautifully. I loved how the vanilla and clove flavors really shined through. They were moist and fluffy. I want to make them again right now. 
DSC_4043
Oatmeal Raisin Cookies
From Better Home and Gardens Cookbook
Makes about 48 cookies

Ingredients
3/4 cup butter, softened
1 cup packed brown sugar
1/2 granulated sugar
1 teaspoon baking powder
1/4 teaspoon baking soda
1/2 teaspoon ground cinnamon
1/4 teaspoon ground cloves
2 eggs
1 teaspoon vanilla
1 3/4 cups all-purpose flour
2 cups rolled oats
1 cup raisins

Directions
Preheat oven to 375 degrees. In a large mixing bowl beat butter with an electric mixer on medium to high speed for 30 seconds. Add brown sugar, granulated sugar, baking powder, baking soda, and cinnamon and cloves. Beat until combined, scraping the sides of the bowl occasionally. Beat in eggs and vanilla until combined. 
Beat in the flour. Stir in the rolled oats then stir in the raisins.
DSC_4048
Drop by rounded teaspoons 2 inches apart on an ungreased cookie sheet. 
DSC_4052
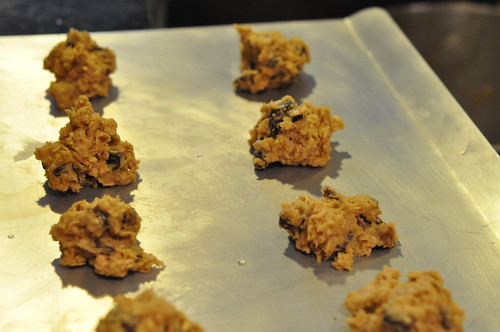
Bake for 8 to 10 minutes or until edges are golden. Cook on cookie sheet for 1 minute, then transfer to a wire rack to let cool. 
DSC_4055

LinkWithin

Related Posts with Thumbnails